Hover active icons before choosing the next action
Use the active status icons in combat as the final read on what is affecting a character or enemy. Hover each icon after the effect appears, read its tooltip, and compare the remaining turns with the turn order. Lootbound does not always explain a named effect before it is applied, so the combat icon is where you confirm the current magnitude and duration.
Do not spend mana on a second copy until you know whether the first copy remains active. Check the target, the icon, and the upcoming turns. A one-turn damage window belongs immediately before the character who can exploit it; a defensive buff belongs before the threatened unit is attacked. Timing an understood effect is more valuable than stacking names without reading their state.
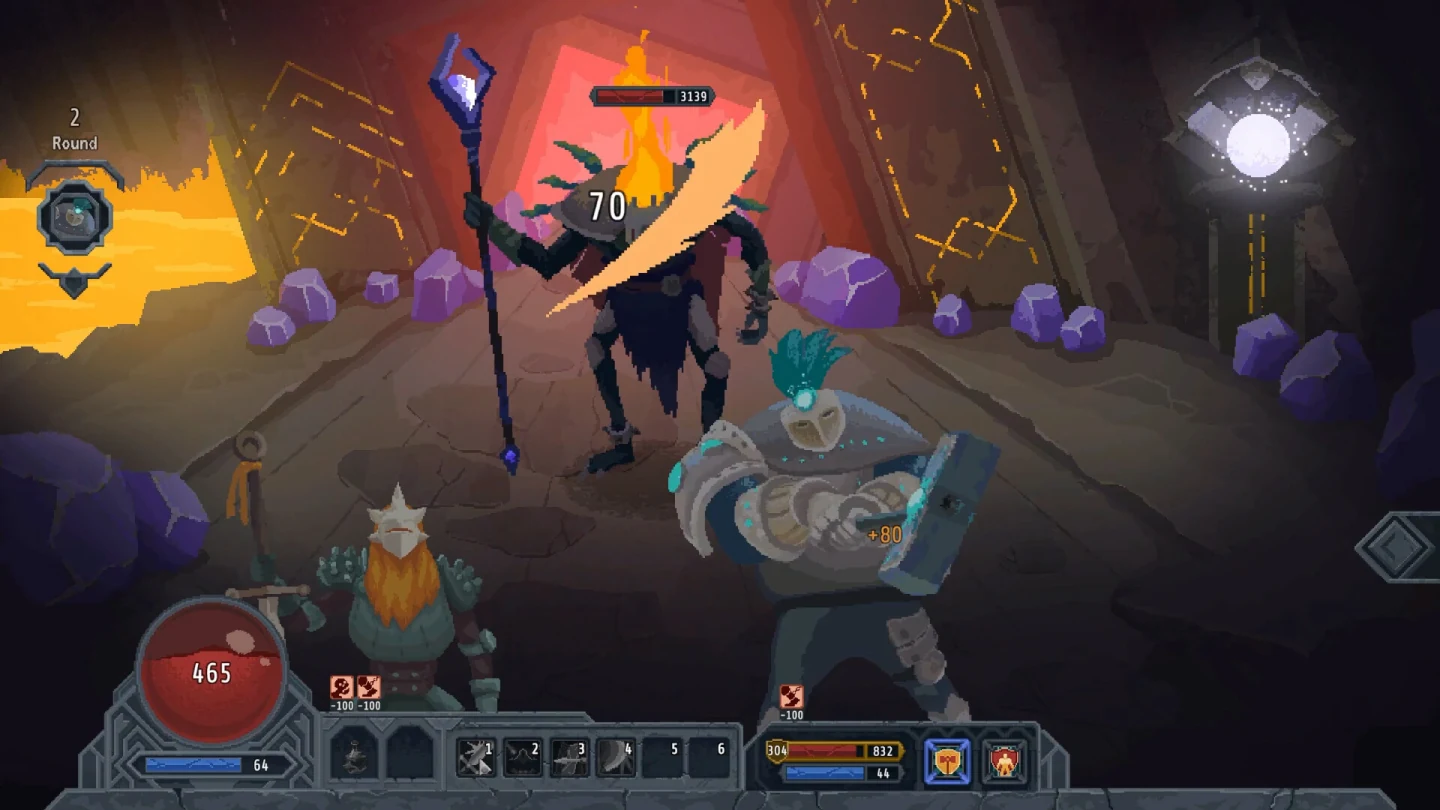
Treat Fury, Speed, and Focus as different offensive jobs
Fury increases damage output. Use it on the party member whose next attacks or abilities will convert that increase into meaningful health loss. Speed improves initiative, so it changes when a unit acts rather than simply making every hit larger. Focus improves critical power; it belongs in a plan that already has enough critical opportunity to use that payoff.
These effects are not interchangeable. Apply Fury when raw damage is the gap, Speed when acting before a threat changes the round, and Focus when the build already values critical hits. If the character cannot act before the buff expires or has little critical support, choose the effect that solves the immediate turn instead of the one with the most dramatic name.
| Effect | Primary job | Best timing question |
|---|---|---|
| Fury | Increase damage | Who deals the most useful damage next? |
| Speed | Improve initiative | Can acting earlier prevent an enemy turn? |
| Focus | Improve critical power | Does this build already create useful critical hits? |
Use Fortitude, Tenacity, and Corruption to control pressure
Fortitude is part of the defensive pressure around incoming damage, while Corruption pushes against enemy Fortitude and helps offensive effects break through that protection. Tenacity belongs on the survival side of the status plan. Read the current tooltip for the exact amount applied because item and ability values differ across a run.
Against a durable enemy, apply the defense-reducing effect before the party's strongest damage turns. Against a dangerous enemy debuff sequence, protect the unit whose failure would collapse the plan. Do not distribute defensive effects evenly by habit. Put them where they preserve the next important action, companion, or damage engine.
- Debuff before the party's high-value attacks.
- Protect the unit whose next action matters most.
- Read the icon again after an enemy refreshes or replaces an effect.
- Avoid assuming that a familiar name uses the same amount on every item.
Plan status timing around visible turns
Start each round by identifying the enemy action that must be prevented or survived. Then locate the party member who can answer it. If initiative allows the answer first, spend only what is needed to secure the kill or control window. If the enemy acts first, prioritize armor, healing, protection, or a debuff that reduces the danger.
Companions act automatically, so place persistent and broadly useful effects on their grids. Keep precise timing tools on the main hero when possible. This reduces the chance that an automatic action consumes a narrow buff before the intended damage dealer can use it. The goal is not maximum icon count; it is a turn sequence that remains predictable.
- Read the next enemy action and turn position.
- Choose the party action that changes that outcome.
- Apply the required buff or debuff before the payoff action.
- Confirm the icon and duration after application.
- Save remaining mana when the round is already controlled.
Diagnose an effect that seems to do nothing
First confirm that the ability targeted the expected unit and that an icon appeared. Next check whether the affected stat changes timing, damage, defense, or critical output; not every result is visible as an immediate health number. Then compare the duration with the turn order. An effect that expires before the relevant action can be working correctly while providing no practical value.
If the icon never appears, re-read the ability condition and target. If the icon appears but the result is weak, the build may lack the matching payoff. Replace the effect only after separating an activation problem from a timing problem. This check keeps you from rebuilding a functional grid when the real issue is that the effect was used on the wrong turn.